Learn how to caramelize onions and draw out the natural sugars within them, producing a deep, complex flavor. Caramelizing onions is a cooking technique that showcases a transformation, turning the sharp, raw onion into a sweet, golden wonder.

This post may contain affiliate link(s). As an Amazon Associate, I earn from qualifying purchases. See Disclosures.
The key to caramelizing onions is patience. As the onions cook slowly, they gradually become golden, and their natural sugars break down. The process takes 30 minutes to an hour, depending on the number of onions you’re cooking and your stove. Whether you’re trying to enhance the flavor of soups, make a savory topping or just add a touch of sweetness to a dish, learning how to caramelize onions properly unlocks new flavor possibilities.
Preparing the onions
Before starting the caramelization process, choosing the proper onions is crucial. Choose onions that are firm to the touch, have smooth outer skin and have no visible signs of bruising or soft spots.
Select onions based on the sweetness and flavor you desire. Here’s a simple guide.
- Yellow onions: An all-purpose choice with a good balance of sharp and sweet notes, which mellow out beautifully when caramelized.
- Sweet onions: Varieties like Vidalia or Walla Walla are naturally sweeter and ideal for a more pronounced sweet flavor.
- Red onions: Their bold flavor softens with caramelization, lending a deep color and mild taste.
How to caramelize onions
The caramelization process requires only patience and a little attention. Here’s how to achieve perfectly caramelized onions.
- Peel the onions and slice them thinly. A thickness of one-eighth inch to one-quarter inch is ideal for caramelizing.
- Heat butter or oil in a skillet over low-medium heat. If the heat is too high, the onions will burn. If it is too low, they will not develop deep colors and flavors. You want the oil or butter to shimmer but not smoke.
- Add the sliced onions and stir to coat them with the butter. Sprinkle on a pinch of salt, as adding salt helps draw out moisture.
- Patience is the key. Slow and steady cooking is the key to caramelization. Stir the onions every five minutes, scraping up any browned bits stuck to the bottom of the pan.
- As the onions cook, they release their moisture and soften. They will gradually turn translucent and then begin to brown at the edges. Continue stirring occasionally. The entire process can take 30 to 45 minutes.
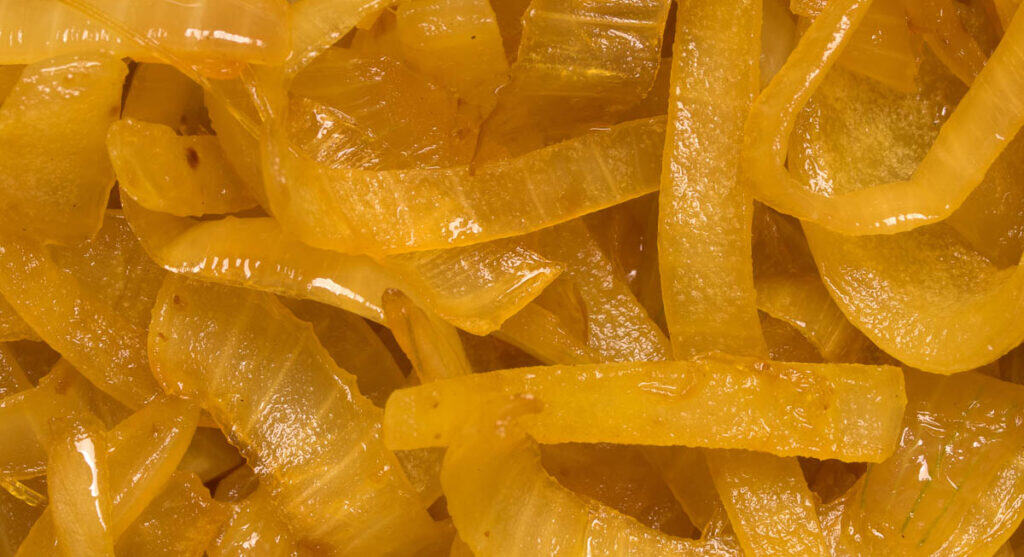
- The onions are caramelized when they are a deep golden brown color, softened throughout and have a sweet, rich aroma. There may still be some translucent bits, but most of the onions should be golden.
- After the onions are caramelized, you can deglaze the pan with a little liquid to lift the flavorful onion bits stuck to the pan, which adds complexity to the onions. You can deglaze the pan with a splash of water, broth or wine. Scrape up the browned bits with a spatula and stir them back into the onions.
“Caramelized onions are 100% worth the time to make them. They are relatively low effort, but the taste cannot be replicated by any other method. Keep your heat low and let time do its magic.”
— Michelle Price, Honest and Truly
Common mistakes to avoid
While caramelization can sound complicated, it is actually straightforward. Avoiding these common mistakes can help achieve that perfect sweet, golden-brown result.
Overcrowding the pan
An overcrowded pan leads to steaming rather than browning. The onions need to be in contact with the hot surface of the pan, so make sure you have a pan large enough to spread them out.
If necessary, cook in batches. Aim for a single layer of onions with some space between them for the best results.
Rushing the process
Turning up the heat to speed things along is tempting, but this can lead to burning. Maintain a consistent, low-medium heat throughout cooking.
Caramelizing onions typically takes between 30 to 45 minutes. Don’t stir the onions too often. Periodic stirring is all that is needed to prevent sticking while allowing onions to develop color.
Storing and reheating
Once cool, transfer the caramelized onions to an airtight container. Mason jars, glass containers with lids or resealable plastic bags work well. Squeeze out as much air as possible before sealing.
Store the caramelized onions in the refrigerator for up to five days. They can also be frozen for up to three months.
Stored caramelized onions can be quickly reheated in the microwave with a splash of water. You can also heat them in a pan on the stove, which takes a little longer but helps them keep their deep flavor.
Serving suggestions
Caramelized onions add a rich, sweet flavor that enhances many dishes. They’re versatile and can add excitement to meals, whether you’re storing leftovers or serving them fresh. Here are some popular pairings.
- Soups and stews: They add richness and depth to any soup or stew, from classic French onion soup to hearty beef stews and vegetable soups.
- Pasta dishes: Toss them with cooked pasta, cheese and a splash of cream for a quick and flavorful pasta dinner. They also pair beautifully with marinara sauces, adding a touch of sweetness.
- Burgers and sandwiches: Add a layer of caramelized onions to burgers or sandwiches. They pair particularly well with strong cheeses like blue cheese or goat cheese.
- Stuffings and dressings: Add them to your stuffing or dressing recipe for a Thanksgiving or holiday twist.
- Dips and spreads: Blend them into a creamy dip for vegetables or crackers, or add them to a sandwich spread.
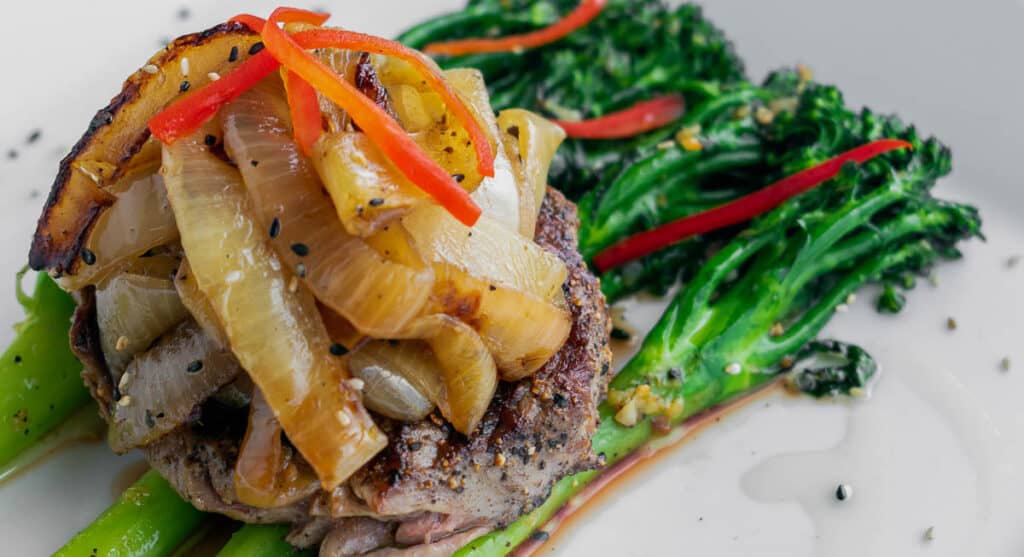
- As a condiment: Top your ribeye steak, roast chicken or hot dogs with a generous spoonful for a classic flavor boost.
The possibilities are endless now that you’ve learned how to caramelize onions. From adding depth to classic dishes to creating unexpected flavor twists, these sweet onions will bring excitement to your cooking.
Anne Jolly is the creator of the food blog Upstate Ramblings. She loves to cook with gadgets like an air fryer, sous vide or pressure cooker. In her free time, she enjoys hiking, reading, knitting and spending time with her three kids.