Have you ever craved sweet, fruity homemade jam but felt intimidated by the canning process? Fear not — 3-ingredient refrigerator jam is here to simplify your jam-making experience. Homemade jam is an incredible way to make the most of all the summer berries and stone fruits.
There’s nothing quite like starting your day with some delicious homemade jam. It’s a tasty addition to your morning toast, pancakes or muffins, but it also makes a thoughtful gift for your loved ones. With a few easy steps, you’ll have a delightful spread to sweeten your day.
What is a 3-ingredient refrigerator jam?
A 3-ingredient refrigerator jam is a simple, homemade preserve that doesn’t require the traditional canning process. As the name suggests, it only needs three basic ingredients: fruit, sugar and lemon juice. This jam is stored in the refrigerator rather than hot-packed, making it a quick and easy option for those who want to make jam without the hassle of canning and dealing with pectin.
What are the 3-ingredients needed
It’s hard to believe you can make jam with just three ingredients. Besides the fruit, two ingredients play major roles in thickening the jam:
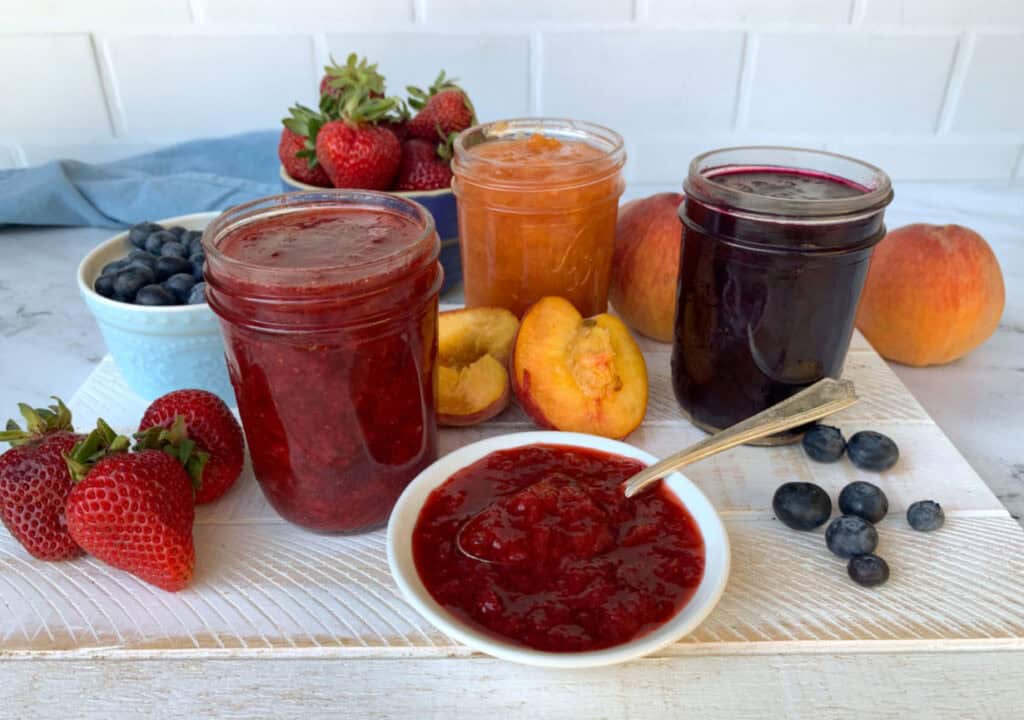
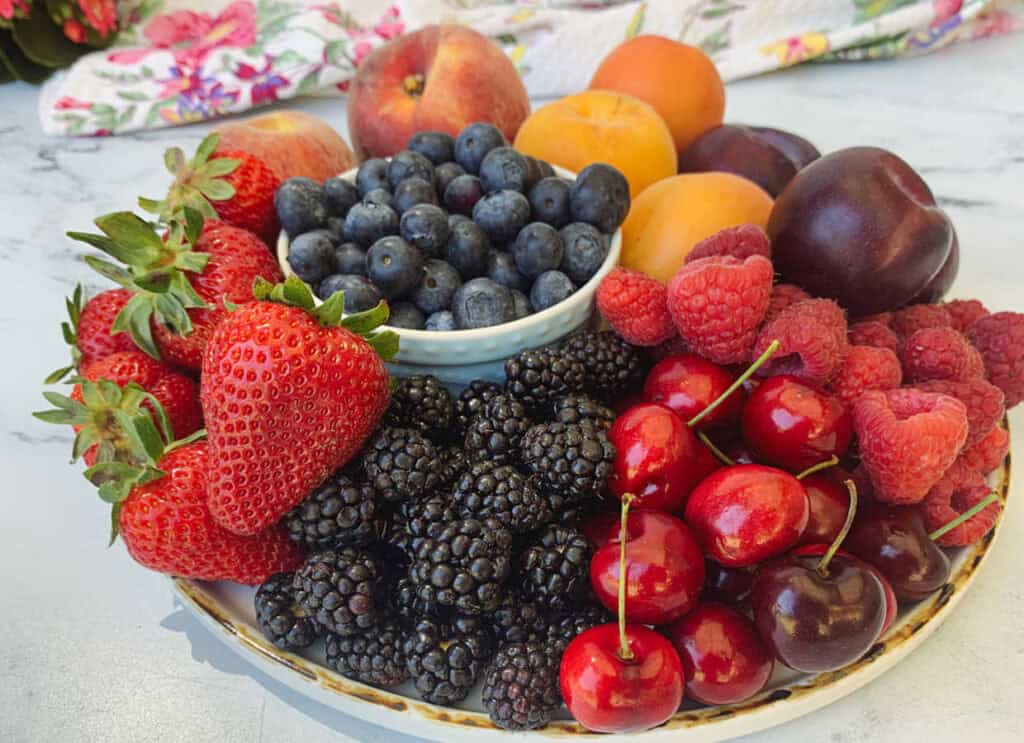
Fruit: The primary component, providing flavor and texture. Common choices include berries like strawberries, blueberries, lingonberries or raspberries, cherries, peaches or plums. The fruit is usually chopped before cooking and then mashed after cooking.
Sugar: Essential for sweetness and preservation. Sugar is super important for making jam sweet and keeping it from spoiling. It also helps thicken the jam by pulling out moisture from the fruit.
Lemon juice: Acts as a natural preservative and helps to balance the sweetness of the fruit with a bit of acidity. It also aids in the setting process, especially for fruits that are low in natural pectin.
How to make a 3-ingredient jam
Before cooking the fruit, make sure it is washed. Choose airtight containers to store the jam and make sure they are washed and sanitized.
Step 1: Chop the fruit into small pieces; it cooks better in small pieces. You do not need to peel the fruit.
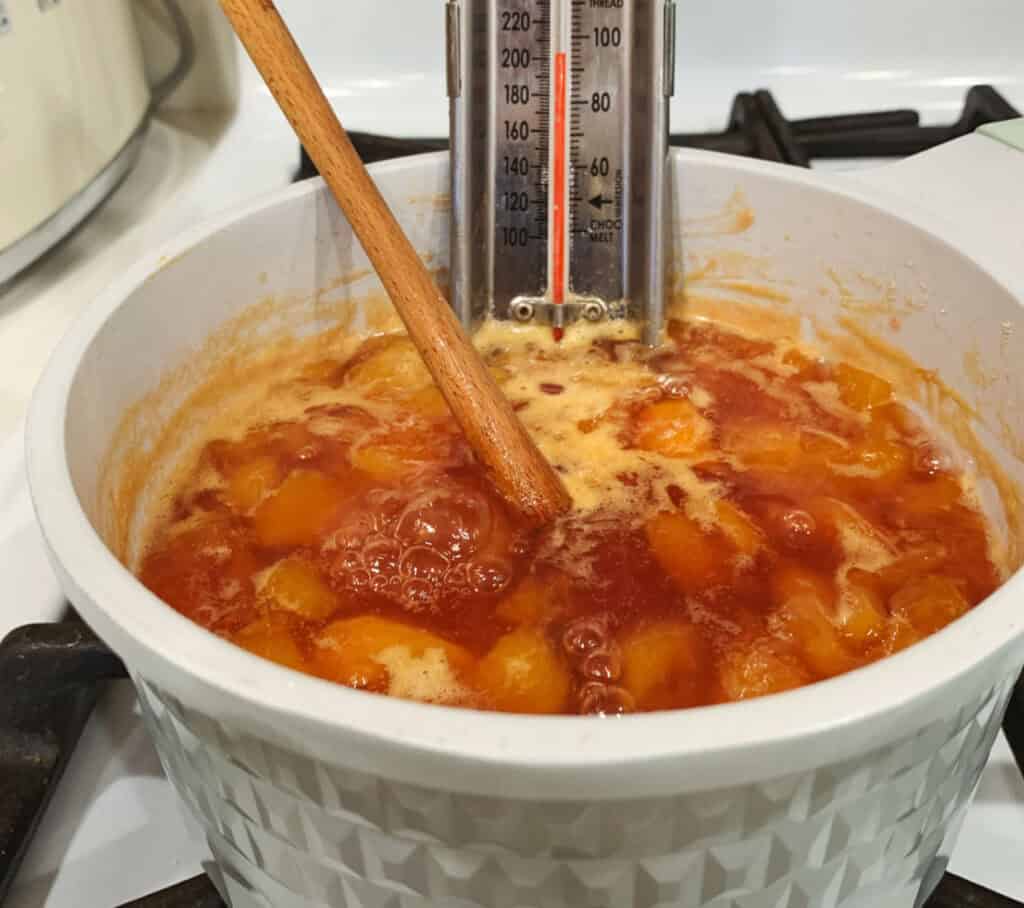
Step 2: Combine the fruit, sugar and lemon juice in a saucepan and cook over medium heat until it boils. Reduce the heat to medium and cook for about 20 to 30 minutes to reach the desired consistency.
Step 3. Test the thickness by placing a small plate in the freezer. Once the jam has cooked for the recommended time, drop a small amount onto the cold plate and let it sit for a minute. If the jam wrinkles when you push it with your finger and doesn’t run, it’s set and ready to be jarred.
Alternatively, insert a candy thermometer into the jam. The jam is ready once it reaches the gel point, usually around 215 F.
Step 4: Mash the fruit into small pieces once cooked.
Step 5: Allow the jam to cool and transfer it to sterilized jars or containers. Refrigerate for up to three weeks.
You will notice that as the jam cooks, it begins to thicken, and then, as it cools, it thickens even more. This type of jam is perfect for those who want a fresh, homemade spread for their French toast or on top of biscuits or desserts without the commitment and complexity of traditional jam-making methods. It tends to be chunkier and has seeds, giving it a delightful homemade texture. I love that this jam isn’t overly sweet, allowing the natural flavors of the fruit to shine through.
How to store refrigerator jam
Refrigerator jam, while delicious, requires proper storage to ensure it remains safe and tasty for as long as possible. Here are some key tips to help extend the shelf life of your homemade jam:
- Use sterilized jars and seal properly: Before filling, sterilize the jars and ensure they are sealed tightly to prevent contamination.
- Label and date jars: Keep track of when the jam was made to monitor for freshness.
- Keep refrigerated and use clean utensils: Store jam in the refrigerator and always use clean utensils to avoid introducing bacteria.
- Check regularly for spoilage: Inspect for mold, off smells or changes in texture and discard if any spoilage is detected.
Remember, even with these precautions, refrigerator jam doesn’t last forever. When stored properly, it typically lasts two to three weeks.
How to make variations
Get creative with your homemade jam by trying different fruit combinations and adding spices. Here are a few simple variations to enhance your jam-making experience.
- Berry mix: Combine tasty summer berries like strawberries, blueberries and raspberries for a mixed berry jam.
- Stone fruits: Try peaches, plums or cherries for a different flavor profile.
- Spices: Add a pinch of cinnamon or vanilla extract for extra depth of flavor.
- Smooth jam: If you prefer a smoother jam, puree it in a food processor after cooking.
There are more ways to enjoy jam than just as a spread. Use jam to make a fruity homemade salad dressing or add it to a cake or bread batter.
We make 25 to 30 jars of blackcurrant jam annually from our bushes. Though blackcurrants are high in pectin and usually set well, we add lemon juice for extra assurance and flavor. The key is boiling it long enough. While most recipes suggest 20 to 30 minutes, we boil ours for over an hour for a more reliable setting.
— Dan Morris, Fire and Saw
Making homemade jam has never been easier. With just a few simple ingredients and a bit of effort, you can make a tasty treat that captures your favorite fresh fruit flavors. Enjoy the sweet rewards with this easy and delicious recipe, perfect for spreading on toast, topping desserts or sharing with friends and family.
Jere Cassidy is the writer and recipe developer behind the blog One Hot Oven. A passion for all things food-related led her to culinary school to expand her baking skills and now to share easy recipes for all home cooks and bakers of all skill levels. When not in the kitchen, Jere’ likes to travel far and wide to find delicious food.