In most climates, raised beds sit empty through winter when they could be producing fresh greens. Adding a cold frame extends the growing season into the cold months, and a basic DIY version only costs around $50 in materials, compared to $150-$400 for pre-built options.

This post may contain affiliate link(s). As an Amazon Associate, I earn from qualifying purchases. See Disclosures.
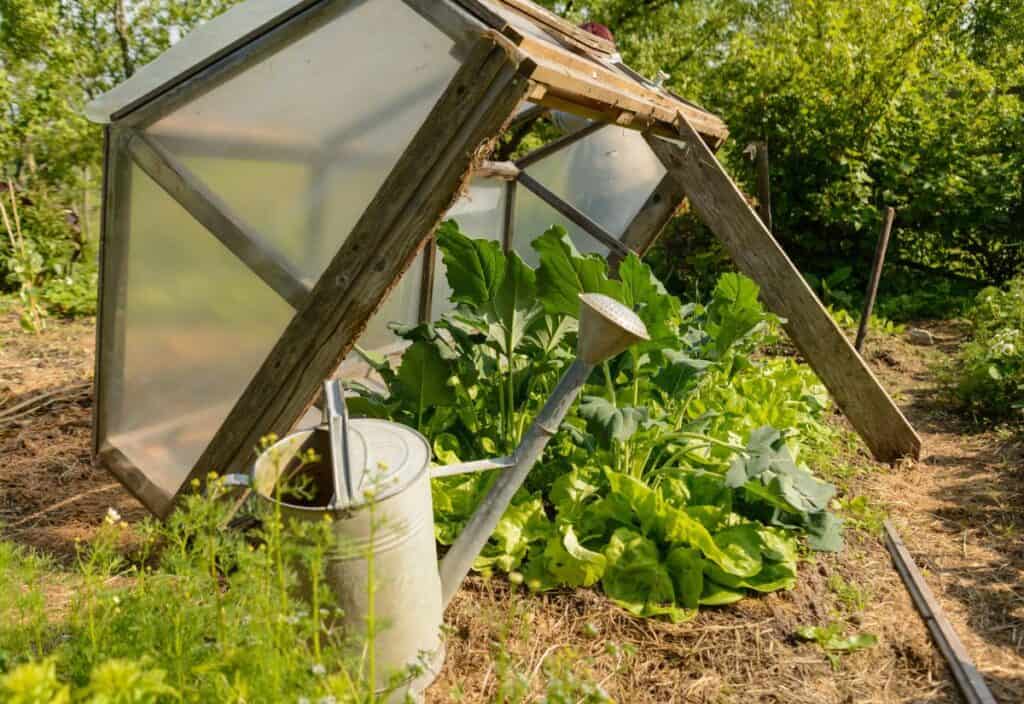
What a cold frame actually does
A cold frame creates a microclimate that stays warmer than the outside air by capturing solar heat during the day and providing insulation at night. The transparent lid allows sunlight in while protecting plants from frost, wind and harsh weather.
This setup differs from a greenhouse in scale and complexity. Cold frames are smaller, simpler structures that sit directly on the ground or on top of existing raised beds. They don’t require heating systems or extensive ventilation setups, making them accessible for gardeners working with basic tools and limited budgets.
The frame extends the growing season in both directions. Plant cool-season crops earlier in spring when the ground would otherwise be too cold, and continue harvesting greens well into winter when unprotected beds would be dormant.
Building beats buying
Pre-built cold frames, such as raised garden beds with an attached frame, or standalone cold frame greenhouse units, can run $150-$400 or more. These come assembled and often include features like automatic vent openers, but the price jump is significant for what amounts to a simple wooden frame with a clear lid.
The DIY approach costs around $50 in materials and can be customized to fit existing raised bed dimensions exactly. Basic carpentry skills and common tools handle the construction, and most builds take an afternoon to complete.
Materials needed for a basic build
The material list is simple and relatively straightforward. Standard lumber boards, typically 2×6 or 2×8, work for the frame. The lid needs to be transparent, allowing light through while providing insulation. Many gardeners use reclaimed materials, which can further lower costs.
Old windows or storm doors make excellent lids if available. They’re already weatherproof, have built-in frames and often come free from renovation projects or salvage yards. Glass provides good insulation but adds weight and breaks if mishandled.
Polycarbonate panels or clear corrugated plastic sheets offer lighter, more durable alternatives. Expect to pay around $20-$30 for enough to cover a standard bed. They resist cracking in cold weather and are easier to cut to size than glass.
Hardware requirements include exterior-grade hinges to allow the lid to open for access and ventilation, wood screws for assembly and optional weatherstripping to seal gaps. A basic supply of these items runs $10-$15. Treating the wood with exterior paint or stain adds a few dollars but extends the frame’s lifespan significantly by protecting against rot and weathering.

Basic construction approach
The frame needs to slope from back to front for two reasons: water runoff and sun exposure. The back should be 6-8 inches higher than the front, creating an angle that sheds rain and snow while maximizing solar gain during winter’s low sun angle.
Measure the raised bed dimensions first. The frame should fit snugly on top of the bed or sit directly on the ground around it. Cut four pieces of lumber to match the bed’s perimeter, with the back piece taller than the front.
Assemble the four sides into a box using wood screws at the corners. The angled sides connect the tall back to the shorter front, creating the sloped top surface. Pre-drilling screw holes prevents the wood from splitting.
Attach the transparent lid to the back edge using exterior hinges. This allows the lid to prop open for ventilation and access while staying attached to the frame. Some builders add a support arm to hold the lid at various angles.
Seal any gaps between the frame and bed with weather stripping or caulk if the fit isn’t tight. This extra step prevents heat from escaping through gaps, which would reduce the frame’s effectiveness.
What grows well under protection
Hardy greens tolerate cold temperatures and thrive in cold frames through winter. Spinach, kale, lettuce and arugula all handle frost and continue growing slowly even in cold weather. These winter garden crops actually taste sweeter after exposure to light frost.
Winter root vegetables, such as carrots, beets and turnips, can remain in the ground under a cold frame and be harvested as needed through winter. The frame protects the soil from freezing, making harvesting possible even in cold climates.
Some herbs tolerate cold frame conditions. Parsley, cilantro and certain varieties of thyme continue to produce through winter with protection. More tender herbs, like basil, won’t survive, but hardy types do fine.
Planting timing matters for winter production. Cool-season crops should reach maturity before the coldest weather arrives since growth slows significantly in December and January. Plant in late summer or early fall for a winter harvest.
Managing temperature and moisture
Cold frames can overheat on sunny days, even when outside temperatures stay cold. The enclosed space traps solar heat rapidly, and temperatures inside can climb 20-30 degrees above ambient air temperature. Plants cook if the frame stays closed during warm spells.
Vent the frame by propping the lid open whenever outside temperatures rise above 40-45 degrees Fahrenheit. Some gardeners install automatic vent openers that respond to temperature changes, but manual venting works fine with daily attention.
Close the lid before temperatures drop in the evening to retain accumulated heat through the night. The goal is to moderate temperature swings rather than maintain constant warmth.
Watering needs to decrease significantly in winter. Cold frames retain moisture better than open beds, and plant growth slows in cold weather, reducing water consumption. Check soil moisture weekly rather than daily and water only when the top inch feels dry.
Snow accumulation on the lid blocks light and adds weight. Brush snow off promptly to maintain light transmission and prevent damage to the frame or hinges.
Extending the frame’s lifespan
Untreated wood exposed to weather deteriorates quickly. Apply exterior paint, stain or wood sealer before assembly or immediately after construction. Reapply protective coatings as needed every few years.
Hinges exposed to moisture and temperature fluctuations need occasional maintenance. Check for rust or binding and replace damaged hardware before it fails completely. Stainless steel or brass hinges last longer than standard hardware.
Transparent panels eventually crack, yellow or become brittle. Glass lasts longer than plastic but shatters when damaged. Keep replacement materials on hand or plan to replace plastic panels every three to five years.
Some gardeners disassemble cold frames at the end of winter and store them during the growing season. Others leave frames in place year-round, removing the lid during summer months. Either approach works, though stored frames last longer by avoiding unnecessary weather exposure.
The investment pays off quickly
A $50 investment in materials produces fresh greens through months when grocery store prices for organic lettuce and spinach run highest. The frame uses raised beds that would otherwise sit empty, maximizing garden productivity and encouraging seasonal eating without requiring additional space.
The simple construction requires no specialized skills or expensive tools. Most gardeners with basic DIY experience can build a functional cold frame in a few hours. The return on that time investment comes in the form of fresh produce for several months.
Cold frames extend the growing season by six to eight weeks on each end in moderate climates, and allow year-round production of hardy greens in many areas. That extended season turns underutilized raised beds into productive space for a minimal upfront cost.
Renee N Gardner is the creator behind Renee Nicole’s Kitchen, a recipe blog based on seasonal ingredients, dedicated to helping home cooks build their kitchen confidence to become home chefs. When Renee isn’t writing, developing recipes or photographing food, you’ll find her in the garden, traveling or enjoying the outdoors with her husband, son and two dogs.