Easter is just around the corner, and if you’re tired of the same old store-bought egg dye kits, it might be time to explore a more creative way to add a splash of color to your festivities. Enter the world of dyeing Easter eggs naturally, where the process is surprisingly easy and lets you achieve eggstraordinary hues that go beyond the ordinary colors.
With natural ingredients, you can create vibrant and unique shades. All it takes is some colorful fresh vegetables and spices to coax out beautiful natural colors.
This post may contain affiliate link(s). As an Amazon Associate, I earn from qualifying purchases. See Disclosures.
Dying Easter eggs naturally
Dyeing Easter eggs naturally refers to coloring eggs using dyes derived from organic and plant-based sources rather than artificial chemicals. Instead of relying on dye kits with chemical additives, natural egg dyeing involves utilizing ingredients like fruits, vegetables, herbs and spices to create vibrant and eco-friendly colors.
This method typically involves creating dye baths by soaking boiled eggs in mixtures made from natural ingredients. These organic materials impart their colors to the eggshells, producing a range of hues. The appeal of natural egg dyeing gives you the opportunity to explore a broader spectrum of colors inspired by nature.
When my kids were younger, we made natural dyes from whatever the kids thought would work. Sometimes the colors were awful sometimes they were amazing, it was always a surprise. The one we loved the most was making purple from red cabbage. That was always a hit.
— Laura Sampson, LIttle Frugal Homestead
Types of ingredients to use for dye
To dye Easter eggs naturally, you can use a variety of ingredients commonly found in your kitchen or garden. Here are some examples of natural dye sources that create vibrant colors.
- Fruits:
- Blueberries for blue/purple.
- Blackberries for purple.
- Cherries for pink/red.
- Pomegranate juice for pink/red.
- Cranberries for pink/red.
- Spices and Herbs:
- Paprika for orange.
- Ground coffee or coffee grounds for brown.
- Cumin for yellow.
- Chili powder for orange/brown.
- Tea:
- Black tea for brown.
- Green tea for light green.
- Vegetables:
- Beets for red/pink.
- Red cabbage for blue.
- Spinach for green.
- Turmeric for yellow.
- Yellow onion skins for orange.
- Red onion skins for purple/brown.
- Other Natural Sources:
- Hibiscus flowers for pink.
- Red wine for purple.
- Spirulina for green.
Feel free to experiment with combinations of these ingredients to achieve a broader spectrum of colors. The longer you leave the eggs in the dye, the more intense the color. Additionally, adding a bit of vinegar to the dye can help the color adhere better to the eggshells. Have fun exploring and creating your unique palette.
Steps for dying eggs
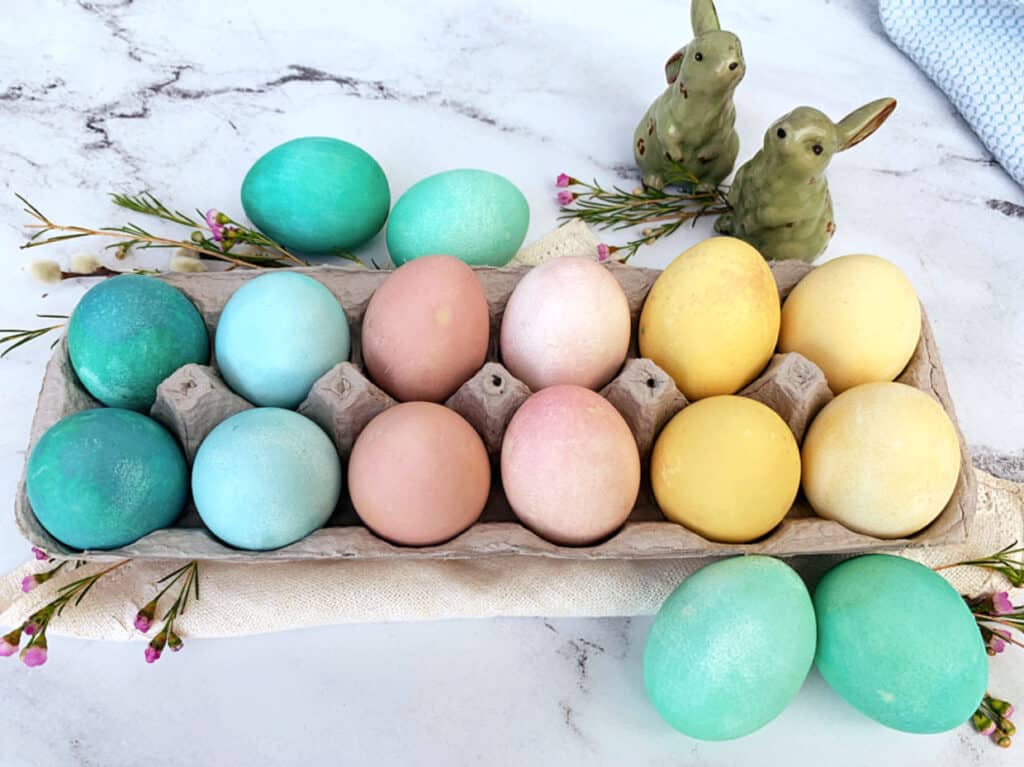
For this batch of twelve eggs, they will be dyed red, blue and yellow. And as a bonus, you can easily create additional dye colors.
- Hard-boil eggs: Make twelve hard-boiled eggs so that you will have four eggs in three different colors. Add four extra eggs for a surprise color if you like.
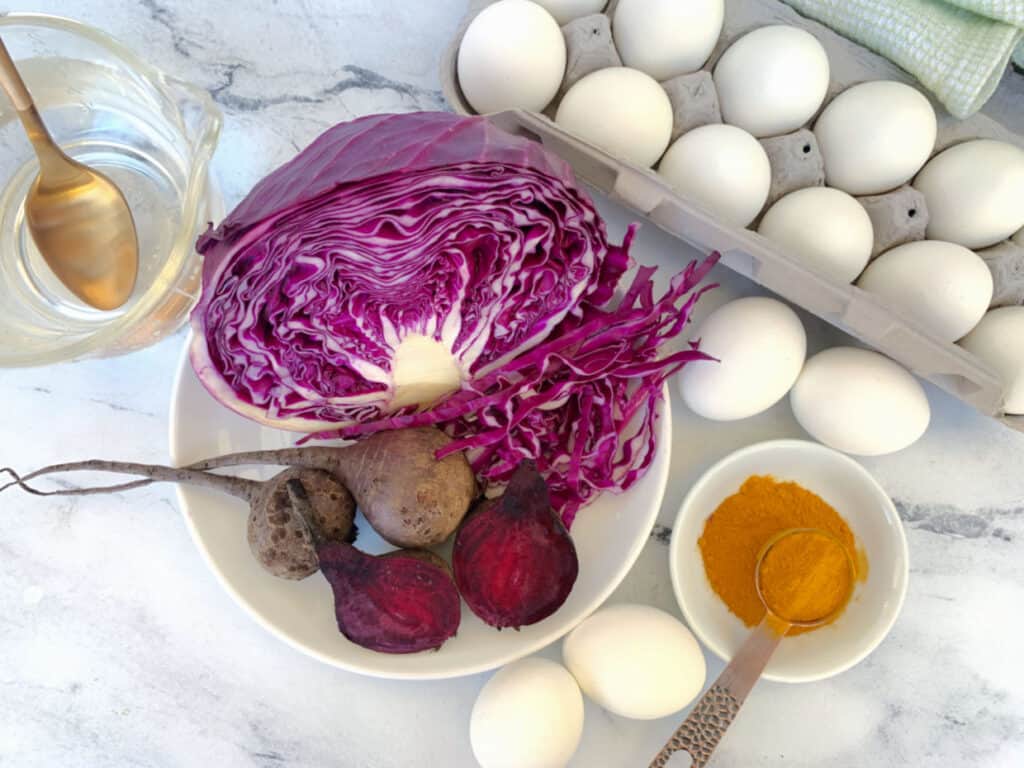
- Gather the dye ingredients: For this batch of Easter eggs, use beets for pink, red cabbage for blue and turmeric for yellow.
- Prep the ingredients: Peel and chop three beets and shred half a head of cabbage. Purchase a bottle of ground turmeric.
- Make the dye: Prepare the dye by using two large pots. In one pot, combine four cups of water with beets; in the other, combine four cups of water with cabbage. Bring both mixtures to a boil, then let them simmer for half an hour, stirring occasionally to ensure the even distribution of colors.
- Strain and add the vinegar: Strain the liquid to remove the cooked solids, then pour the colored dye into large bowls. Add two tablespoons of white vinegar to each.
- Make the turmeric dye: Add two tablespoons of ground turmeric powder to a large bowl and add four cups of boiling water. Stir to dissolve, then add two tablespoons of white vinegar.
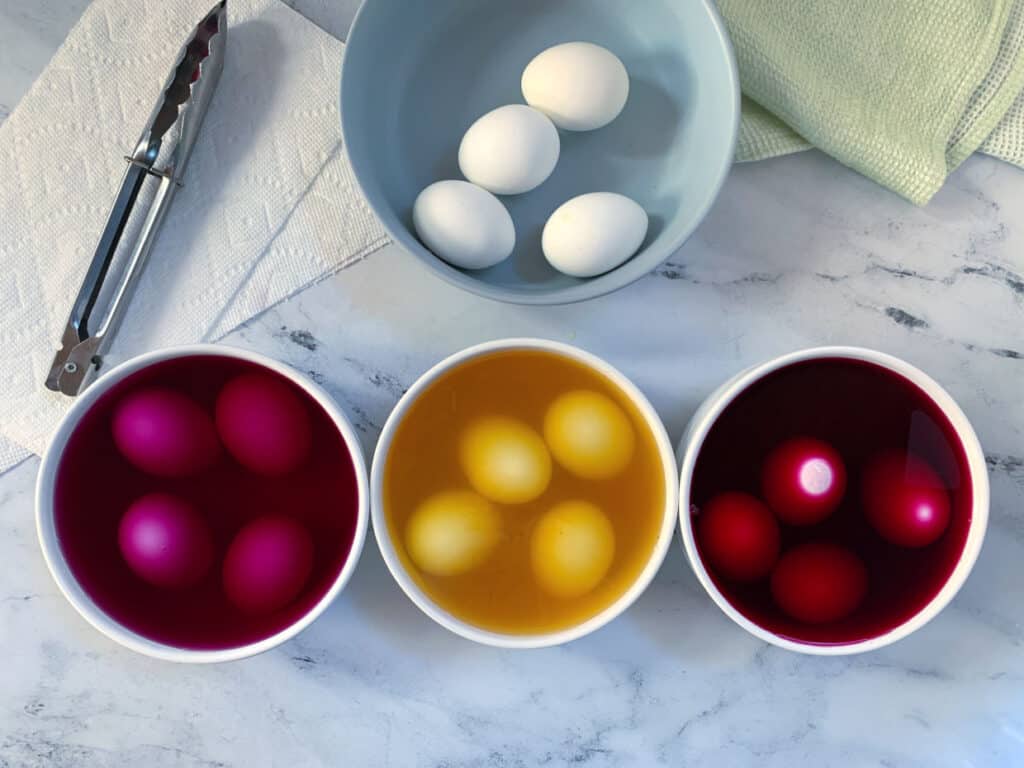
- Soak and dye the eggs: Place the eggs in the dye, making sure they are fully submerged. Aim for 10-20 minutes for a subtle tint, while a more vibrant color may require up to an hour in the dye. Place the eggs in the refrigerator if you dye them longer than an hour for food safety. You can leave the eggs in the fridge overnight for even deeper colors.
- Dry the eggs: When the desired color is reached, remove them to a paper towel to dry completely before storing them.
- Store the eggs: Once the eggs are dry, store them in the refrigerator.
Achieving different shades
Experiment with the dyeing time to achieve various shades. To achieve a gradient effect, dye one batch for a shorter duration and another for a longer period. This way, you can create a visually appealing assortment of eggs with various colors.
Easter egg bonus color
A fun aspect of dyeing Easter eggs is the ability to mix the dye colors to create various hues. If you want to do this, make sure to boil extra eggs to use these additional dye colors.
- Mix the blue and yellow dyes for green eggs.
- Mix the red and yellow dyes for orange eggs.
- Mix the red and blue dyes for purple eggs.
Make sure the dye sticks to the eggs
If the dye doesn’t adhere well, make sure your eggs are chilled and rub them with white vinegar before immersing them in the dye. This process will remove any oils or cooking residue, resulting in a clean egg.
Since I was a kid, we used to wrap eggs in various colors of onion skins. Sometimes, we added small leaves just under, which resulted in engraved stamps. It was the time when the whole family got together, and I continued this tradition with my kids, when they were little.
— Zuzana Paar, Lowcarb-Nocarb
Safety precautions on dying and storing dyes eggs
Before starting the dyeing process, it’s crucial to keep the hard-boiled eggs refrigerated until you are ready to apply the colors. Ensure that any cracked hard-boiled eggs are promptly discarded to maintain safety standards. Keep in mind that hard-boiled eggs should not be left unrefrigerated for more than two hours.
Display your colorful eggs
Finally, proudly display your naturally dyed Easter eggs in a decorative bowl or basket. Not only will they be a beautiful addition to your Easter celebrations, but you’ll also have the satisfaction of knowing you created them with simple, natural ingredients. Dyeing Easter eggs naturally adds a personal touch to your holiday traditions. Utilizing common kitchen ingredients allows you to create a stunning array of colors and hues without artificial dyes.
Jere Cassidy is the writer and recipe developer behind the blog One Hot Oven. A passion for all things food-related led her to culinary school to expand on her baking skills and now to sharing easy recipes for all home cooks and bakers of all skill levels. When not in the kitchen, Jere’ likes to travel far and wide to find delicious food.